Brushing Up On Photoshop
Becoming newly acquainted with Photoshop can usually be broken down into 3 separate stages of development. The first stage requires effective utilisation of deep breathing techniques, regular comfort breaks, and determining that your general state of anxiety is the result of Post Traumatic Stress Syndrome.
Naturally, all of the above will have occurred before you’ve even determined how to type the word ‘HELP’ on a new Photoshop document, or worked out that the magic wand tool has absolutely no connection to acquiring a new dress, sparkly shoes and securing a stable and secure future with Prince Charming.

During the second stage of this blossoming courtship, you find yourself experimenting with the basic techniques of airbrushing. Having viewed this as a huge leap forward in your development and filled with immense pride, you change your Facebook profile photo, so that the world can share in your joy and sense of achievement.

Then you reach stage 3, where you continue to research the many Photoshop tools at your disposal and soon discover that you’re capable of creating some awesome and inspiring graphics (it’s usually around this stage of development that you also have a drastic rethink of that Facebook photo and promptly delete it).
When you self teach any type of software, you find yourself on a continual journey of discovery. For example:

However:

You should have this image in your head right now.

OK, here’s the technical bit. Brushes in Photoshop, aren’t just for ‘brushing’ on colour, or airbrushing techniques. Brushes can also be used to add various graphic effects and in some instances can replace the need to import a JPEG from a different source, for example, a texture image.
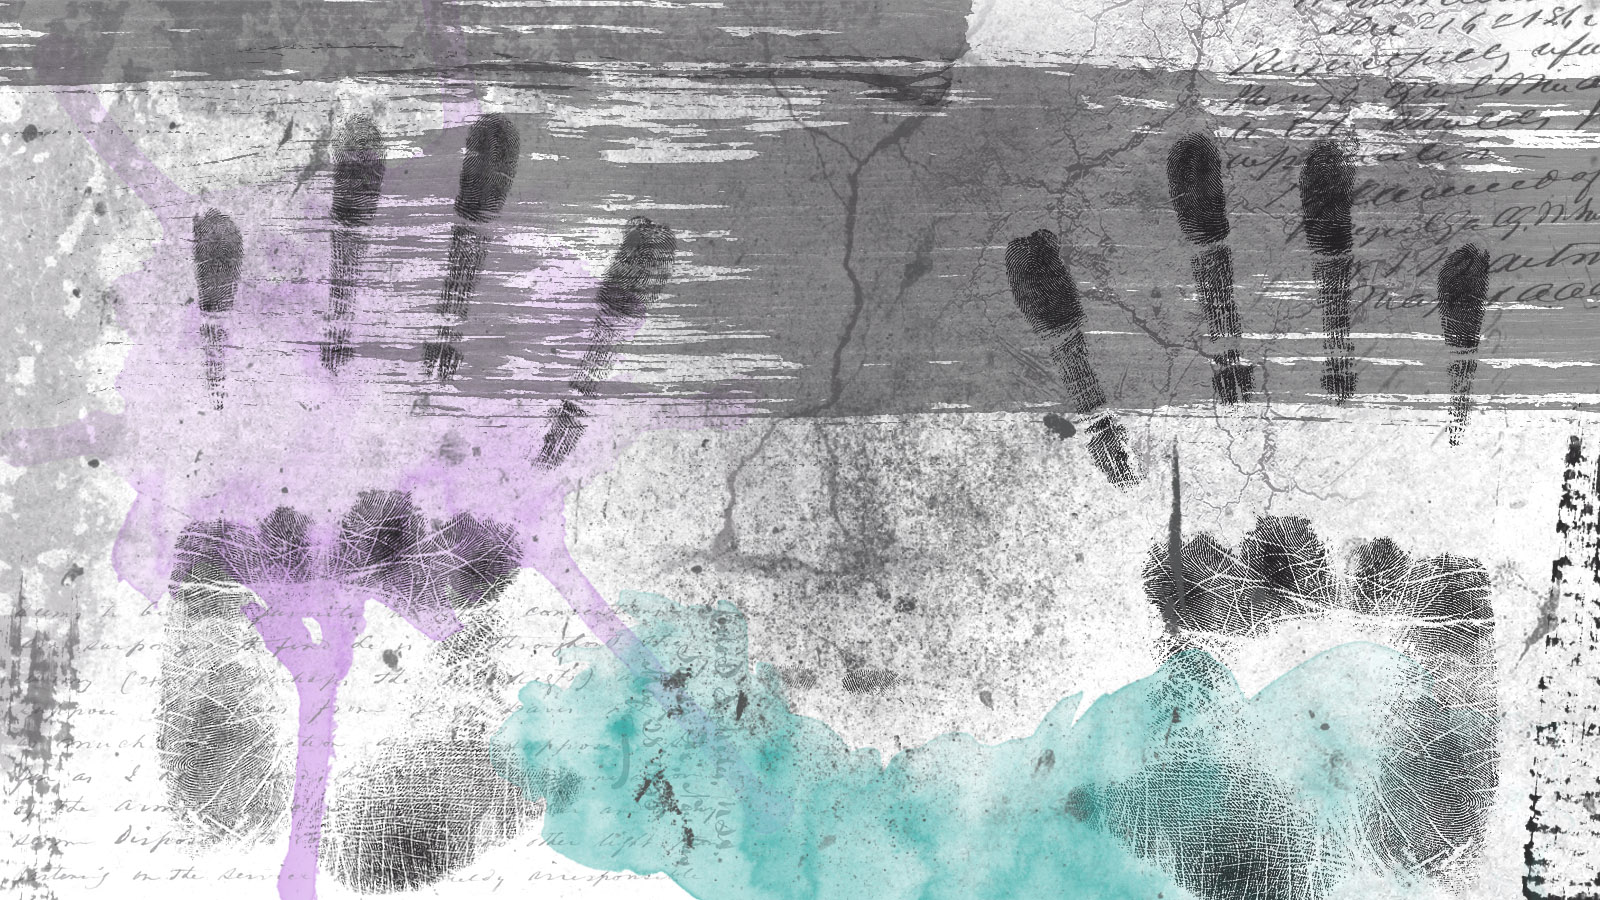
Brushes, like fonts, can be downloaded (for free) from many graphic specific sites and are worth their weight in gold. The background in the Dymo font image was created with multiple ‘dirt’ brushes. The finger prints, hand print, coffee ring and various smudges in the typewriter font image were also created using brushes. The tear in the above image was, yep you guessed it, created via a brush. You get me?
YES!! This magnificent (piece of Art) was created using Photoshop brushes!
Go forth and experiment with Photoshop brushes!
And don’t forget to report back if you’ve found any good ‘uns!


6 Comments
Super…..I will be straight onto that when I finish this module in 2023!! Thanks for the tips as per. I find your blogs inspirational, thought provoking and full of downright honesty, so there 🙂
LikeLike
Amanda! Thank you so much 🙂 xx
LikeLike
I love me some killer brushes. I need to download some more and play around a bit. Brushes alone seem to inspire new ideas, ya know? Great article, Neeters.
LikeLike
That’s so true – sometimes you can get a ‘light-bulb’ moment when you’ve come across an awesome brush/effect/texture. Thanks, glad you liked it 😉
LikeLike
[…] you download a few lurid ‘dirt’ or ‘grunge’ Photoshop brushes (yes, they are actually referred to as ‘dirt’) and then set about creating your dirt […]
LikeLike
[…] reflective of my increased skill where Photoshop is concerned – another steep and painful learning curve! I’m especially fond of the texture of the bird in this scene and the realism of the […]
LikeLike