The CAD Chronicles
I always knew that I had a certain level of creative ability but my interior design studies have stirred up abilities and skills that I never knew I had the potential to demonstrate. What has surprised me the most is my new-found skill base and knowledge of various CAD software applications and in particular photo-realistic rendering.
I’m not going to get all ‘techy’, so bear with me.
My biggest sense of achievement has been teaching myself all of this stuff. Admittedly in the early days my self-teaching sessions usually commenced after a dubious glass of wine or two to try and ease the pain, anguish, torment and daunting task of teaching myself complex CAD software. And I wouldn’t necessarily recommend the ‘Chardonnay teaching method’ as a full-proof technique – especially when technical floor plans that started with crisp perfectly straight horizontal lines quickly deteriorated into something that resembled an ECG graph.

However, 3D modelling and rendering is a whole different ball game altogether. Have you ever wondered what it’s like to see a crazy woman scream at her laptop with the intention of putting it in a headlock? Ask a complete novice to self-teach 3D modelling and trust me; you will witness unbelievable acts of insanity.
However, I should point out that my random acts of violence towards laptops are now firmly behind me.
I have decided to share a picture diary charting my gradual (and sometimes torturous) progression into 3D modelling/rendering right from the beginning. This is proof that nothing is impossible!

My first attempt at SketchUp. Yes…the less said about this the better. Moving swiftly on.

And this is my first render. How exquisite!! What beautiful external walls! Can you see my vision for this space? Well, can you?!

Ahhh, progress!! This is my first ‘proper’ attempt at rendering a SketchUp model. Oh, how I whooped and cheered!
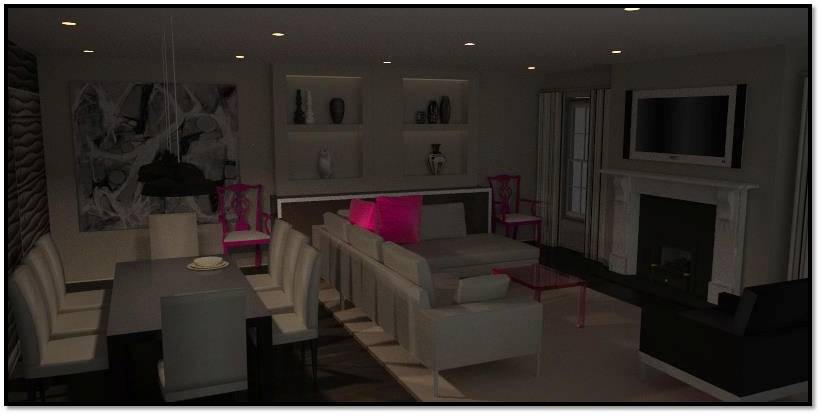
Major breakthrough! The entire space has been furnished much more realistically (including textures) AND it has artificial lighting. At this stage I was grinning like the proverbial ‘Cheshire Cat’.

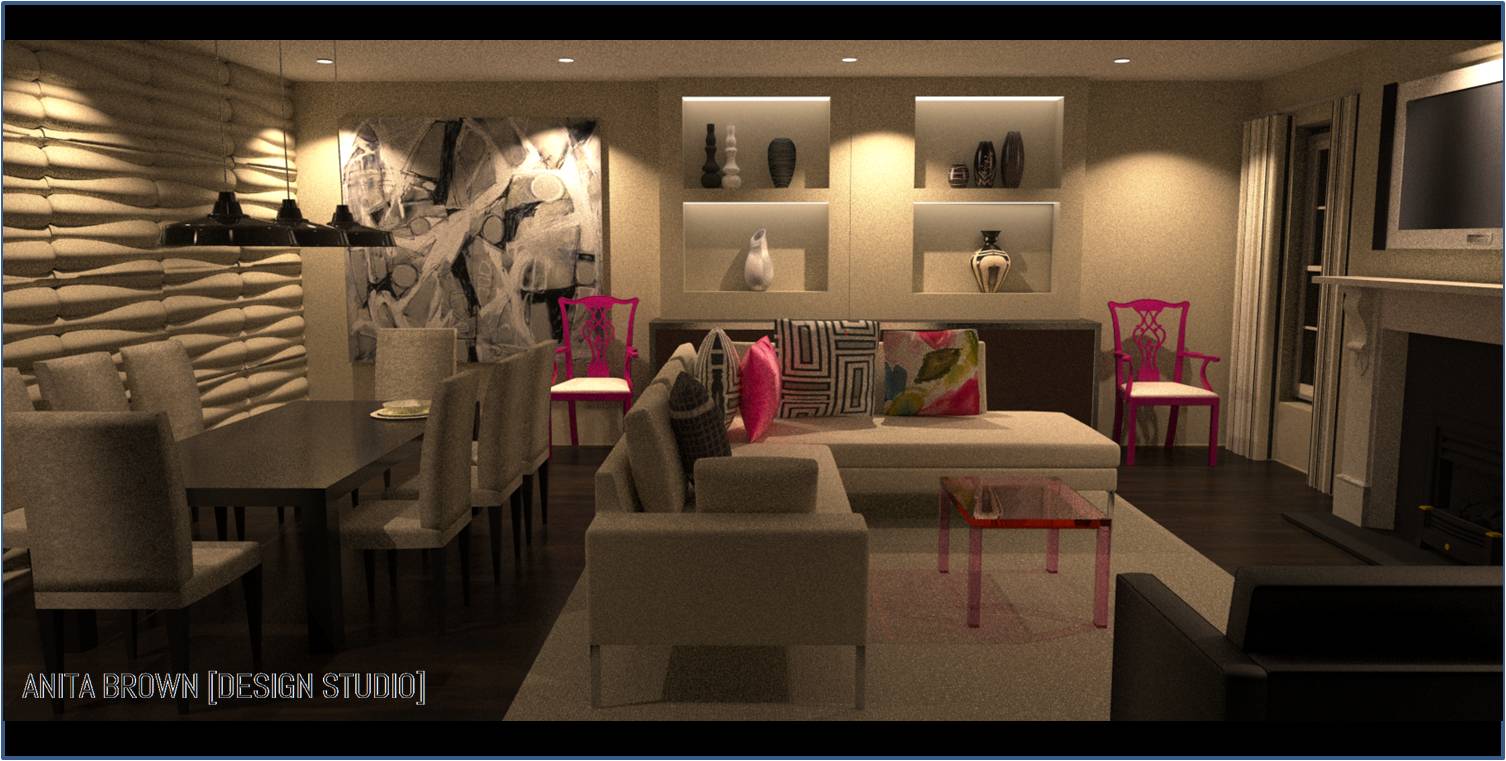
It took months of determination and perseverance but I got there in the end.


14 Comments
Ah Anita! You do make me laugh! I use CAD a lot but for 2D floorplans, and have also started to use 3D rendering tools. I need to try Sketchup then since your last images look so good! DId you use the basic model to get these images done or have you bought some of the ‘options’ to improve it? On your textured wall are you using Art Unic’s Wall Flats – Drifts? I am about to use this on a client’s wall. Just ordered them yesterday!
LikeLike
Gabrielle, I’m so glad that you’re enjoying my posts! And thanks for your kind comments. The final images were created via a 3D model in SketchUp (free version). Although I now use the Pro version. YES!! The walls panels are called ‘Drift’!! I’m thrilled that you were able to recognise them – it means that my render was successful in conveying my chosen materials!!
LikeLike
oh that gives me (some) hope! I found self-teaching myself CAD (namely Vectorworks) incredibly painful. Although I also love the feeling of incredible joy when things finally do go right 😉
LikeLike
Anita, you’ve come a very long way in a very short time. good work.
LikeLike
Hey there ‘girlindesign’!! Long time no hear, how’s the studying coming along? You’re right about the sense of achievement 😉
Dave, thanks for the vote of confidence my wee mucker (you know what ‘mucker’ means, right??!!) 🙂
LikeLike
Anita, I’ve never read that word as a term of endearment. 😀 I hope you mean it in a good way. 😉
LikeLike
Haha, yes I mean it in a good way!!
LikeLike
Oh, good. That’s a relief!
LikeLike
Dave, c’mon now! Why would I ever have a bad word to say to you or about you?! 😉
LikeLike
You’re right. I should have put a big grin in my last comment. 😀 😀
LikeLike
Hello again Anita, I have to leave a little comment about this post as a ‘rendering lover’ ;o) Love it! And seeing how you progressed, with not only the interior design but also the rendering, is very remarkable and inspiring, especially since you are self-taught. I cannot wait to see what you will produce the day you decide to use 3D Max (or similar) but I am already impressed by sketch-up and your rendering. Love the wall (drift), it makes you want to touch the screen (great with the light/shadows).
Bouchra x
LikeLike
Hello again!! Thank you for your positive comments Bouchra! I’m thrilled that you like my rendering efforts (the more developed ones!). I’m thinking of sticking with SketchUp and Maxwell Render for the foreseeable future. I’m very familiar with the interfaces of both and they work very well together. If it ain’t broke, eh?! 🙂
Anita x
LikeLike
Hi again Anita, So were the last 2 images done with the Pro Sketch-up or with the basic one?
LikeLike
Hi Gabrielle! All the last 3 images were created using the free version of SketchUp and the student licence of Maxwell Render. Hope this helps!
LikeLike