How to Create a Digital Concept Board
We all know how much I adore 3D Visualisation and its accuracy at conveying a design concept and its multitude of benefits. But sometimes a concept board is useful to help you, the Designer, play around with ideas and give your client an initial ‘feel’ for the designs you have in mind, before you engage the services of 3D Visualisation. I’m loathed to refer to them as ‘mood’ boards. I think this reference started via dodgy interior design shows in the 90s; either way these presentation boards are effective at pulling together the colour palette, fabrics, pieces of furniture and inspiration behind a design scheme, whether it’s Interior Design, Wedding Planning or Event Design.
This may look simple but trust me, it can take quite a while to produce a board that is visually stimulating, inspirational, has a good overall composition and accurately conveys the various design elements within your proposed space.
Here are my 5 top tips when creating a digital concept board:
- Make sure your images are clear and free of pixilation. Do you really want your client to suffer the unflattering possibility of having to squint at your images? No, you most certainly do not!
- Try to place images on the board in accordance to where they are located in reality. For example, keep images of flooring, sofas and side tables to the lower half of the board and lighting etc. at the top. Sometimes this isn’t always possible because of the composition of the image. This isn’t a deal-breaker. Sometimes you just gotta go with your creative flow and if that means the sofa goes to the top of the board; then so be it.
- Mix up the proportions of the images to keep the overall board visually interesting. For example, instead of having an image of a teeny tiny vase stuck in the corner, BIG IT UP! Increase its size on the board to help draw the eye and add a little depth.
- Use image editing software to remove unnecessary backgrounds (or crop your images if needs be). This will ensure all attention is focused on the item in question and you’ll also achieve that glossy interiors magazine look.
- Be creative! Include an interesting background to your board that ties in with the overall design. Or add shadows to some of your images and throw in a few angled or off-set images – this will stop your board from appearing too one dimensional and can help draw attention to showstoppers in your design.
Here are some of my concept boards to help whet the appetite!

This board includes a sleek reflective background and a funky border to help keep things visually interesting.

A contemporary colour palette of grey, yellow and black makes this board instantly invigorating. Note the inclusion of (an angled) image of moss growing on a rock as inspiration for the colour palette. Cool, huh?

A soft and whimsical historical colour scheme is set off beautifully with period detailing (Egg and Dart cornice) and overlapping images to add depth.

This concept board mirrors the overall modern design elements – crisp, clean and minimal.
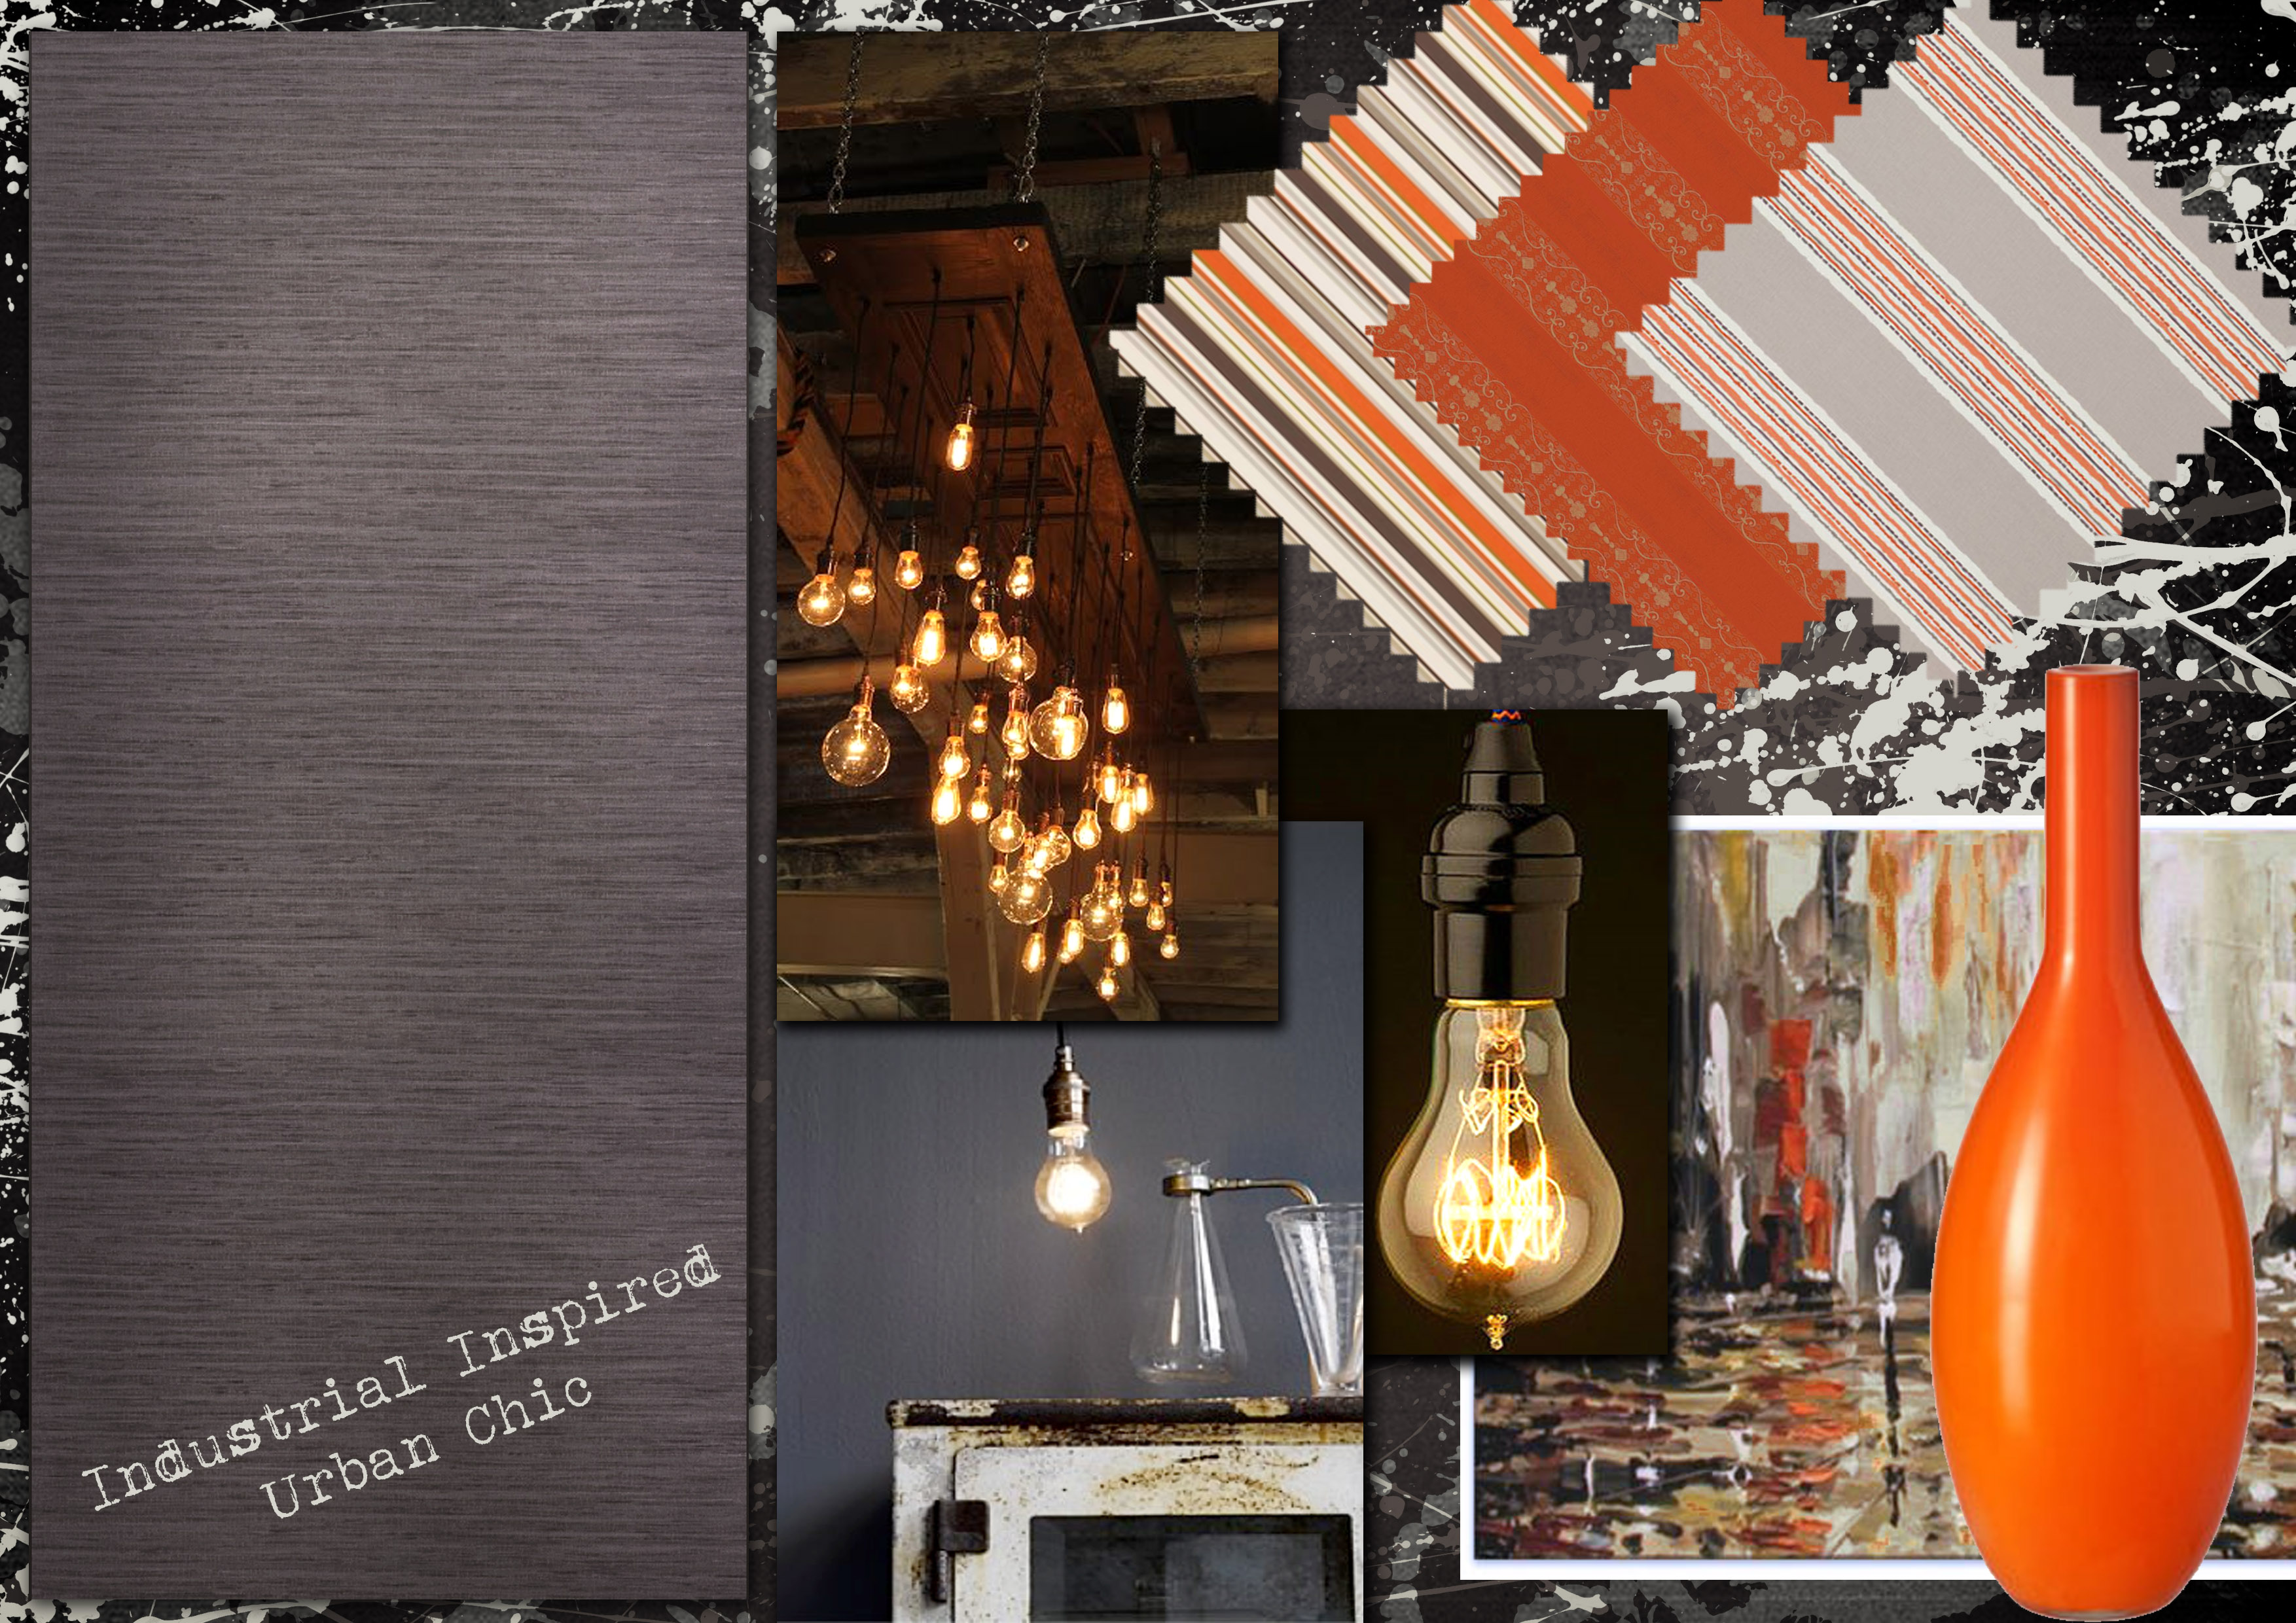
This board includes a grunge background to reflect this ‘urban’ design and incorporates a mix of proportions to keep things tantalizing.
![]()


4 Comments
Love your work Anita. I work on Mac – which software would you recommend to do Concept boards and what do you use as your image editing software?
LikeLiked by 1 person
Hi Jackie, thanks for your comment! Believe it or not, all of the above boards, bar the last one, were created using PowerPoint!! You don’t really need cutting edge software to produce a visually pleasing digital concept board. The secret is making sure you have high quality images and crop/position them effectively.
The last board (urban) was created using Photoshop. I was able to create scalloped edges on the fabric samples, remove unwanted backgrounds and make it generally a little more crisp.
Hope this helps!
LikeLike
Enjoyed this Neets; brought back some memories from when we did the FdA, which I loved….especially the boards. I would still like to mess around and create some boards, just for the seer fun of it, but I don’t have any editing programmes on this laptop (macbook pro), which was my son’s and I only have the use of a very poor version of powerpoint (Google Drive) x
LikeLiked by 1 person
Hello lovely! Memmmmorries!! You should give it a go anyway! I’d love to see the results! x
LikeLike